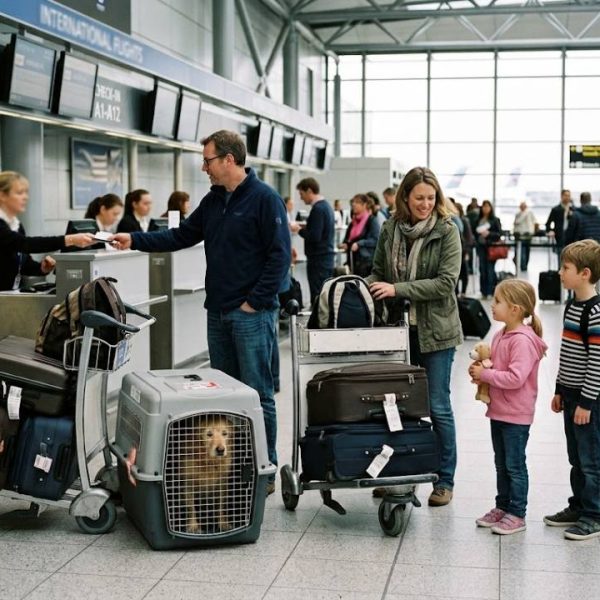
For many families, a move abroad is only possible if the dog or cat comes too. Pets are family, and leaving them behind is simply not an option. The good news is that thousands of animals relocate internationally every year without problems. The less good news is that the process involves strict rules, precise timing and a surprising amount of paperwork. Miss one step and your pet may face quarantine, a long delay or even refusal at the border.
This guide walks through international pet relocation step by step, so you can plan calmly and avoid the most common mistakes.
Step 1: Research the rules of your destination
Every country sets its own import rules for animals. The European Union has a shared system for dogs, cats and ferrets, while countries such as Australia, New Zealand, Japan and the UK have their own, often stricter, requirements. Some countries require a blood test months before travel. Others ban certain breeds entirely.
Start your research at least six months before moving. For some destinations, a year is safer. Always check official government sources, because rules change and forum advice is often out of date. For travel within or into the EU, the European Commission explains the rules on its page about movement of pets.
Step 2: Microchip first
Almost every country requires an ISO-compatible microchip. The chip must be implanted before the rabies vaccination, otherwise the vaccination may not count. Ask your vet to scan the chip at every appointment to make sure it can be read, and keep the chip number on every document.
Step 3: Rabies vaccination and waiting periods
Rabies vaccination is the core requirement for most international moves. After the first vaccination there is usually a waiting period, often 21 days, before the animal can travel. Some countries also require a rabies antibody blood test at an approved laboratory, followed by a waiting period that can last up to three months.
- Microchip implanted and recorded.
- Rabies vaccination given after the chip.
- Blood test if your destination requires it.
- Waiting periods calculated backwards from your travel date.
Step 4: Health certificates and official paperwork
Close to departure, a vet must issue a health certificate confirming that your pet is fit to travel and meets the destination's rules. Depending on the country, the certificate may need official endorsement by a government veterinary authority.
Language is where many families get stuck. Vaccination records, previous vet reports and pet passports are often written in the language of the country you are leaving. If you are moving from Germany to an English-speaking country, border officials may ask for documents in English. Many families use certified german translation services so that vaccination histories and vet letters are accepted without questions.
The same issue affects families arriving from Eastern Europe. Records written in Russian need accurate russian to english translation, and since 2022 many Ukrainian families relocating with their animals have needed english to ukrainian translation of host country instructions to understand what was required. A clear, accurate document can be the difference between a smooth arrival and days of stress at the border.
Beyond individual language pairs, many families simplify the paperwork by using professional document translation services that handle the full set of pet travel documents in one project. These providers translate health certificates, vaccination records and import permits with the accuracy that border officials and airlines require. Having every document prepared to the same standard avoids the last-minute scrambles that delay so many relocations. For a move that already involves enough stress, that reliability is worth the investment.
Step 5: Choose how your pet will fly
Small pets may travel in the cabin with you if the airline allows it and the carrier fits under the seat. Larger dogs usually travel in the hold as checked baggage or as manifest cargo. Some countries only accept pets as cargo. Each option has different rules, costs and booking procedures, so contact the airline early.
Avoid long layovers, extreme temperatures and connections where your pet must change aircraft. Direct flights are kinder to animals and reduce the risk of missed connections.
Step 6: Prepare your pet for the crate
Your pet's travel crate should feel like a safe den, not a prison. Introduce it weeks before the move. Feed meals inside it, leave a familiar blanket in it and practise short car trips. Animals that are used to their crate travel much more calmly.
Step 7: The days before departure
- Keep routines as normal as possible during packing.
- Consider a pet sitter or kennel on moving day to avoid chaos.
- Feed a light meal several hours before the flight.
- Do not sedate your pet unless your vet specifically advises it.
- Put copies of all documents in a waterproof folder attached to the crate.
Step 8: Arrival and settling in
After landing, your pet may need to pass a document check or a short veterinary inspection. In some countries a quarantine period follows. Once home, give your pet a quiet space, keep familiar items around and stick to routines. Register with a local vet quickly and update the microchip database with your new address and phone number.
Common mistakes to avoid
Most relocation problems come from a small set of errors: vaccinating before microchipping, miscalculating waiting periods, using the wrong form of health certificate, forgetting official endorsement or presenting documents the authorities cannot read. A simple checklist with dates, kept up to date by one family member, prevents almost all of them.
A new home for the whole family
Moving abroad with a dog or cat takes planning, patience and attention to detail. Start early, follow official rules, keep documents clear and in the right language, and prepare your pet for the journey. With good preparation, your four-legged family member can start a new life by your side.